How to connect your nabooki account with QuickBooks
Please note: Account set up must be complete
To connect your nabooki account to QuickBooks, you need to have an account with QuickBooks Online.
Don't have a QuickBooks account? Sign up!
1. Integrate Nabooki with QuickBooks Online
In nabooki, using the left navigation menu, go to Add-ons > QuickBooks
To enable the integration select Connect to Quickbooks
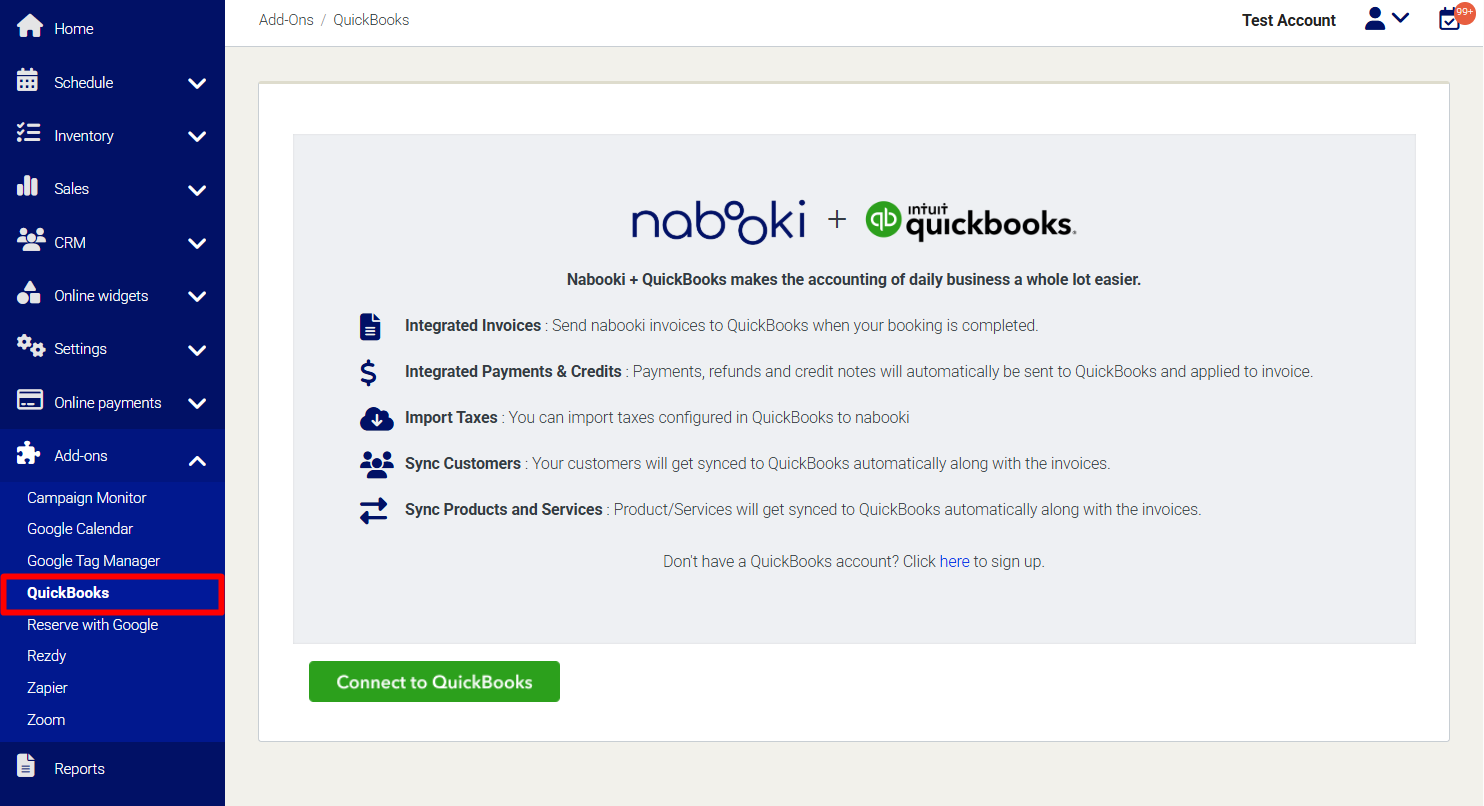
If you are not logged in to QuickBooks, it will ask you to log in.
Click on Connect button to enable the integration between Nabooki and QuickBooks.
You will land on Add-ons > QuickBooks page where you can see integration is enabled. With enabling the integration, all of your QuickBooks tax codes will be automatically imported to Nabooki. If any tax is created in QuickBooks after enabling the integration, you can sync it manually by clicking on the "Sync Taxes" button.
2. Assign QuickBooks tax codes to your services in Nabooki
To see all taxes, click on the "Assign taxes to services" button on Add-ons > QuickBooks page.
Alternatively, using the left navigation menu, go to Settings > Taxes & Invoicing > Taxes tab > to assign a QuickBooks tax to services, press the '•••' button > Edit
3. Assign QuickBooks tax to all services
On the Edit Tax page, select 'All services' in the 'Applicable to' drop down and click Update.
4. Assign QuickBooks tax to Selected services
On the Edit Tax page, select 'Selected services' in the 'Applicable to' drop-down, select services in the 'Selected services' drop down and click Update.
Need Help?
If you need assistance, contact our support team:
💬 Live Chat: Click the chat icon in the bottom-right corner of the screen.
📧 Email: support@nabooki.com
Related Articles
How to Update Your Nabooki Account Email Address
If you need to change the email address associated with the account owner, follow the steps below. This process involves adding the new email as a user and promoting them as the account owner. Important: Updating this email does not change your ...How to Access Your Nabooki Account
To manage your bookings, services, and settings, you’ll need to log into your Nabooki account. Follow the steps below to sign in securely. Step 1: Go to the Nabooki Login Page 1️⃣ Open your web browser and go to the Nabooki login page, accessible via ...How Does Nabooki Bill Me?
? Your Nabooki subscription is billed automatically based on the plan you selected when signing up. At the end of your free trial, the subscription fee will be charged to the credit card on file. Your billing cycle depends on your plan type: ✅ ...Does Nabooki Charge Booking Fees?
? Good news! Nabooki does not charge any booking fees. Unlike other platforms that take a commission per booking, Nabooki allows you to accept bookings at no extra cost—keeping more of your revenue in your pocket. ✅ No per-booking fees ✅ No hidden ...Sync invoices with QuickBooks
Automatic Sync When your nabooki account is connected to QuickBooks and QuickBooks tax code is assigned to your service(s), all future invoices will automatically sync to QuickBooks. If an invoice gets updated in Nabooki, updates will be ...