How to prevent invoice syncing issues between Nabooki and QuickBooks due to invoice number clash
One common challenge businesses face is invoice number clash when syncing of invoices between different systems.
An example of this issue occurs when an invoice number already exists in QuickBooks, and a user attempts to sync a Nabooki invoice with the same invoice number. In such cases, the invoice will fail to sync, because invoice numbers must remain unique.
This article aims to help business users prevent invoice syncing issues caused by invoice number clashes between Nabooki and QuickBooks.

Note: The current Nabooki-QuickBooks integration only syncs invoices from Nabooki to QuickBooks. Manually raised invoices in QuickBooks will not sync back to Nabooki, meaning invoice numbers incremented directly in QuickBooks will not update the next invoice number in Nabooki.
To avoid the invoice numbers clashing, you need to use a different number sequence in both systems. One of the ways to achieve this is to start your sequence in Nabooki from a much higher number. For example, if in QuickBooks you have raised under 1000 invoices, in Nabooki you can start your sequence with 50000, to ensure that invoices raised in QuickBooks will not reach Nabooki’s sequence soon.
Steps to set up your invoice sequence in Nabooki:
1️⃣ On your Nabooki Merchant Profile, go to Settings > Taxes & Invoicing
2️⃣ On the Next invoice number field, change the current number to your desired next invoice number (e.g. 5000).
3️⃣ Then add a sample booking in Nabooki to verify that the invoice number uses the new sequence.
Steps to set up your invoice sequence in QuickBooks:
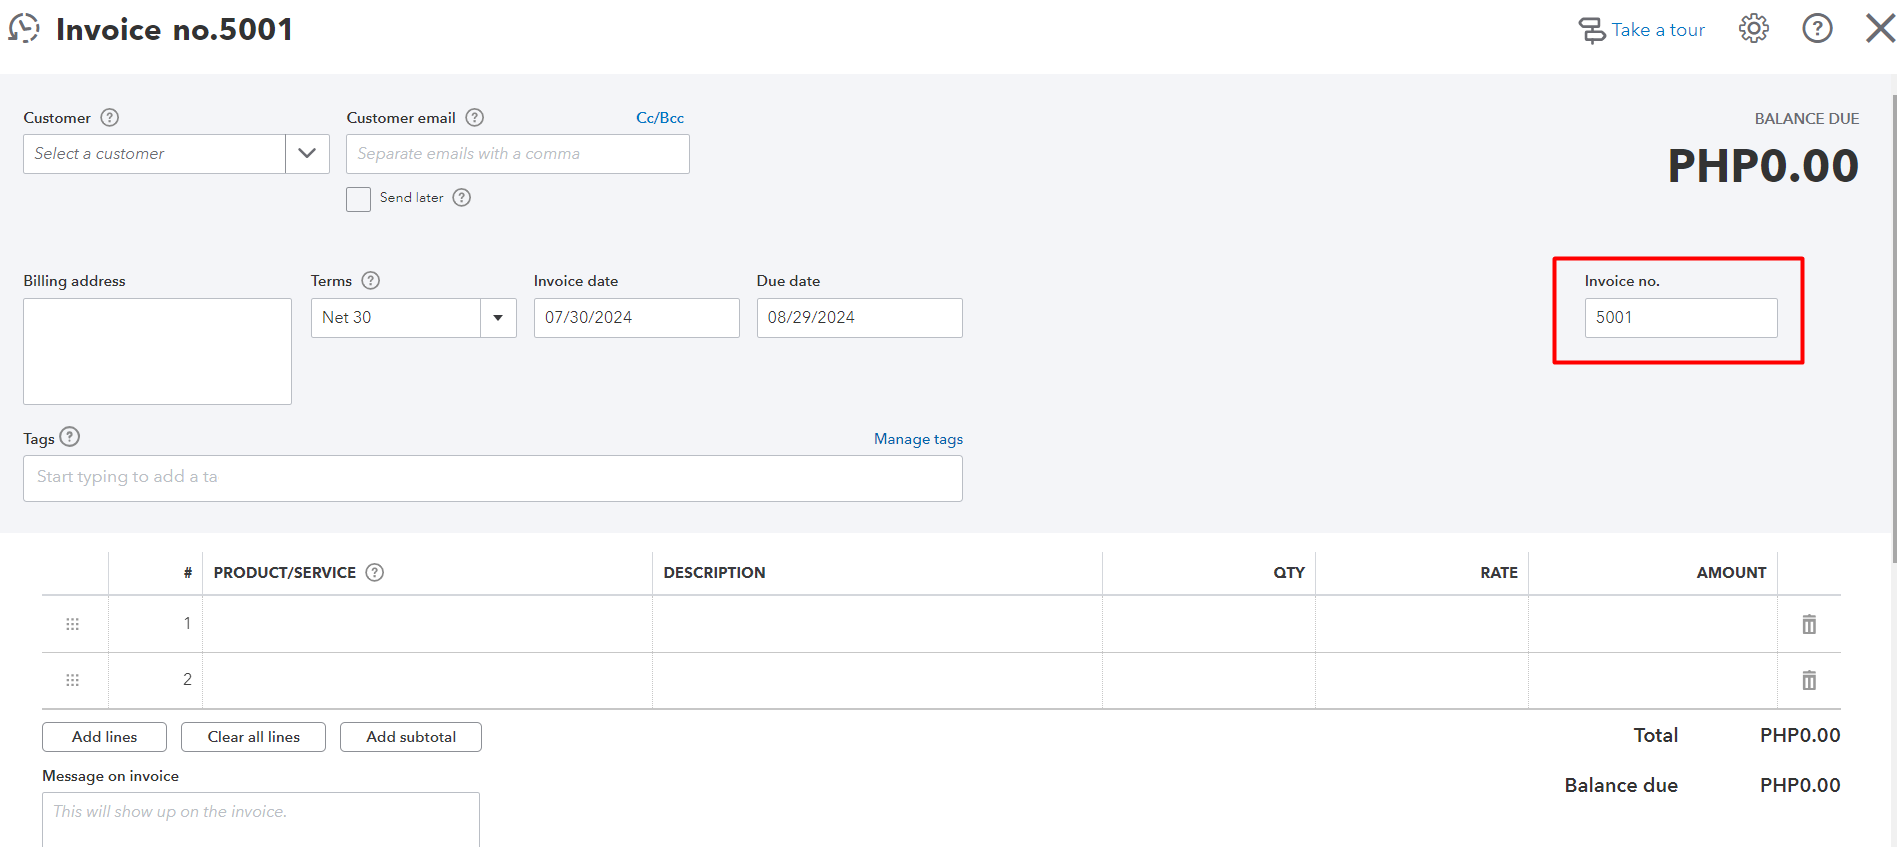
1️⃣ On your QuickBooks account, verify that the Nabooki invoice has been synced and has the same invoice number as in Nabooki (e.g. 5000).
2️⃣ On your QuickBooks account, raise an invoice manually. It will likely suggest 5001 as your next QuickBooks invoice number. Change the number manually to your desired sequence (e.g. 1000).
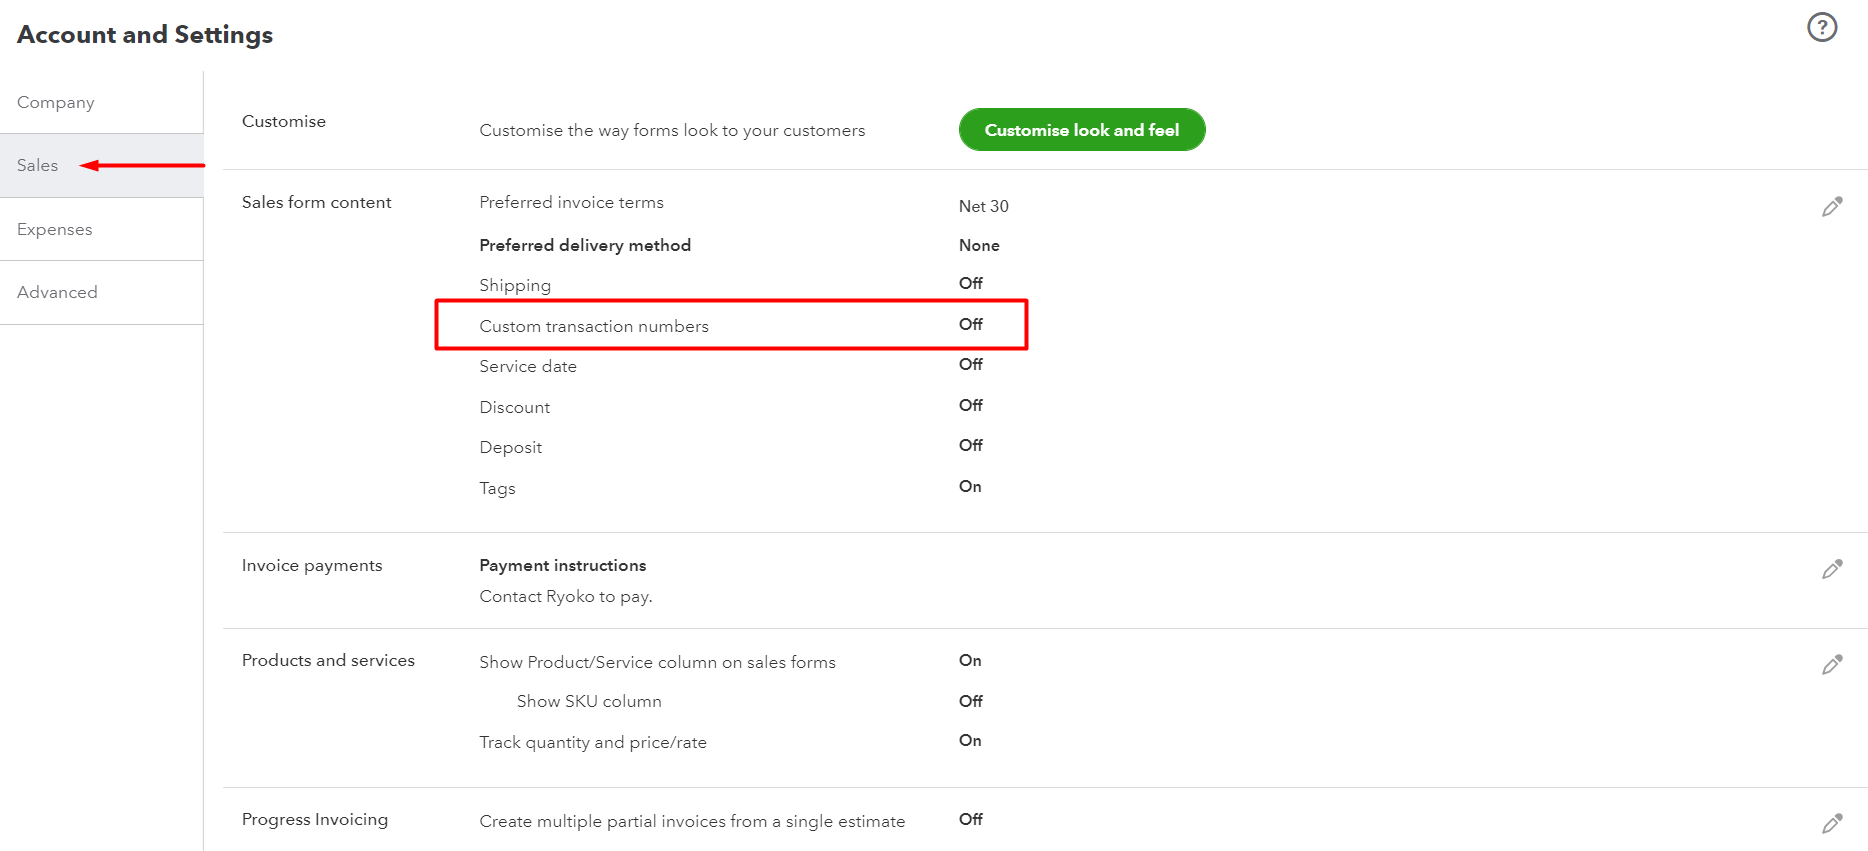
3️⃣ Before saving the manually raised invoice, ensure that the Custom transaction numbers setting is turned on. This can be accessed in QuickBooks via Settings > Account and Settings > Sales > Sales from content. For more information on how to turn on or off your custom transaction numbers, please click here.
4️⃣ Save the manually raised invoice and then on your QuickBooks account, turn off your Custom transaction numbers setting.

5️⃣ From this point forward, all invoices generated in Nabooki will commence with 5000, while your other invoices manually generated in QuickBooks will continue using your QuickBooks sequence.
Need Help?
If you need assistance, contact our support team:
💬 Live Chat: Click the chat icon in the bottom-right corner of the screen.
📧 Email: support@nabooki.com
Related Articles
How to View, Download, Edit, Email, and Print Invoices
Managing invoices effectively helps you keep your billing organised and ensures customers receive accurate documents. This article explains how to view, download, edit, email, and print invoices within Nabooki. View an Invoice 1️⃣ In your calendar, ...How to Prevent Bookings at Certain Times of the Day Using the 'Busy Time' Feature
Need to block out specific times when bookings aren’t available? The Busy Time feature allows you to prevent customers from booking during specific hours of the day, ensuring your schedule remains flexible and under control. This guide explains how ...Sync invoices with QuickBooks
Automatic Sync When your nabooki account is connected to QuickBooks and QuickBooks tax code is assigned to your service(s), all future invoices will automatically sync to QuickBooks. If an invoice gets updated in Nabooki, updates will be ...How Does Nabooki Bill Me?
? Your Nabooki subscription is billed automatically based on the plan you selected when signing up. At the end of your free trial, the subscription fee will be charged to the credit card on file. Your billing cycle depends on your plan type: ✅ ...How to Use the Close Event Function to Prevent Further Bookings
The Close Event function allows you to manually stop additional bookings for a scheduled session. This is useful when: You want to temporarily block new bookings without cancelling the event. You need to prevent last-minute bookings beyond a certain ...