River Revival Voucher Program - Update your offers
This article is a guide on how to prepare your business listing and offers for the River Revival Voucher Program. Please see the Table of contents to quickly locate relevant information.
Log in to Nabooki account
- If you have forgotten your password, please click "Forgot your password?" below the login button
- If you have forgotten the email address that you used for your Nabooki account, please contact our support team via rrv@nabooki.com
Where to find promotions
Using the left navigation menu, go to > Promotions > RRV-100E / RRV-100 / RRV-200 / RRV-750.
How to update pricing
To update or change your pricing, using the left navigation menu, go to Promotions > RRV-100E / RRV-100 / RRV-200 / RRV-750 > Press the '•••' button to the right of the corresponding offer > Edit > General tab. Navigate to the price field, update the price and press Update .
Additional Discounts:
If you wish to offer an additional discount, we recommend using the 'Display as sale price'. This will allow you to show your RRP, and the price you're offering for the promotion (before the voucher discount).
Groups or Packages:
If your offer is for a group, please ensure the price is displayed for the per person. We request that you add the per person price to the description.
Example: if your offer is for a group of 4 people, you are required to update the following fields; deal name, price, min. quantity per booking, max. quantity per booking, and default quantity (via More details).
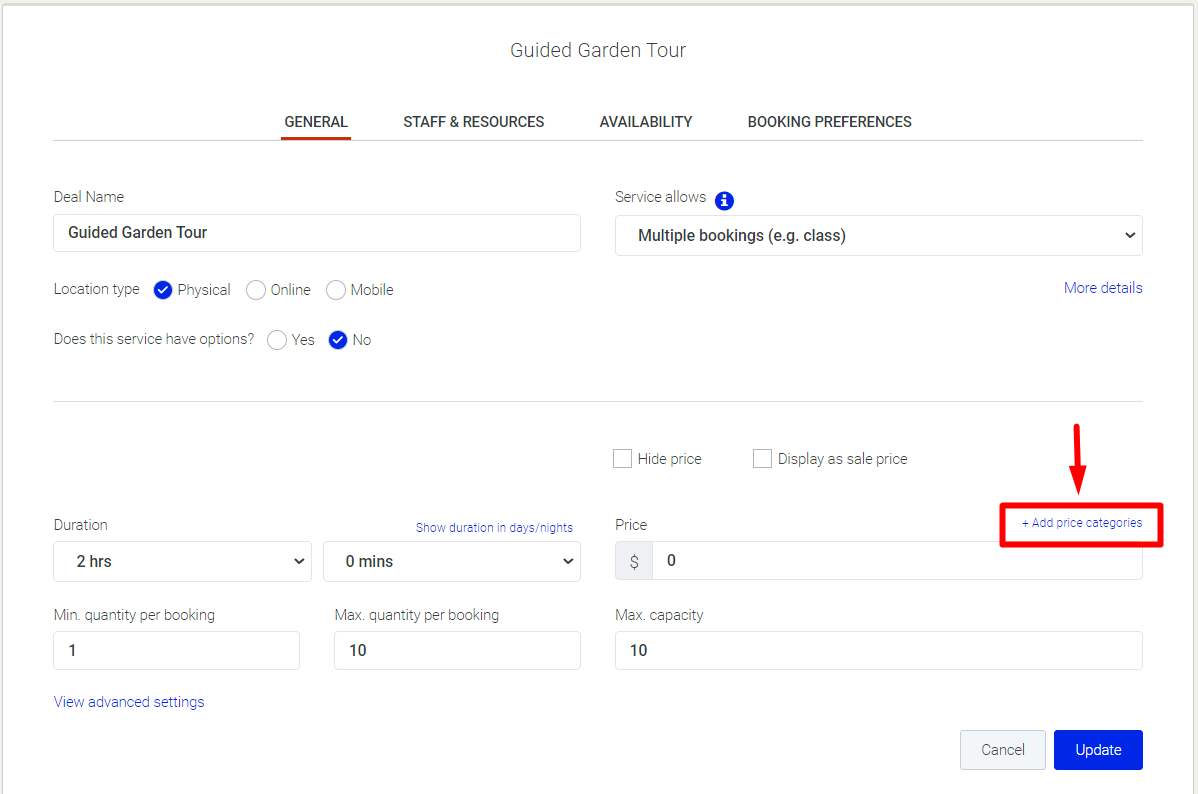
How to add price categories
If your offer has different price categories (eg. Adult prices, Child prices etc), you can add this via Promotions > RRV-100E / RRV-100 / RRV-200 / RRV-750 > Press the '•••' button to the right of the corresponding offer > Edit > General tab. Navigate down to '+ Add price categories' and create each price category as required.
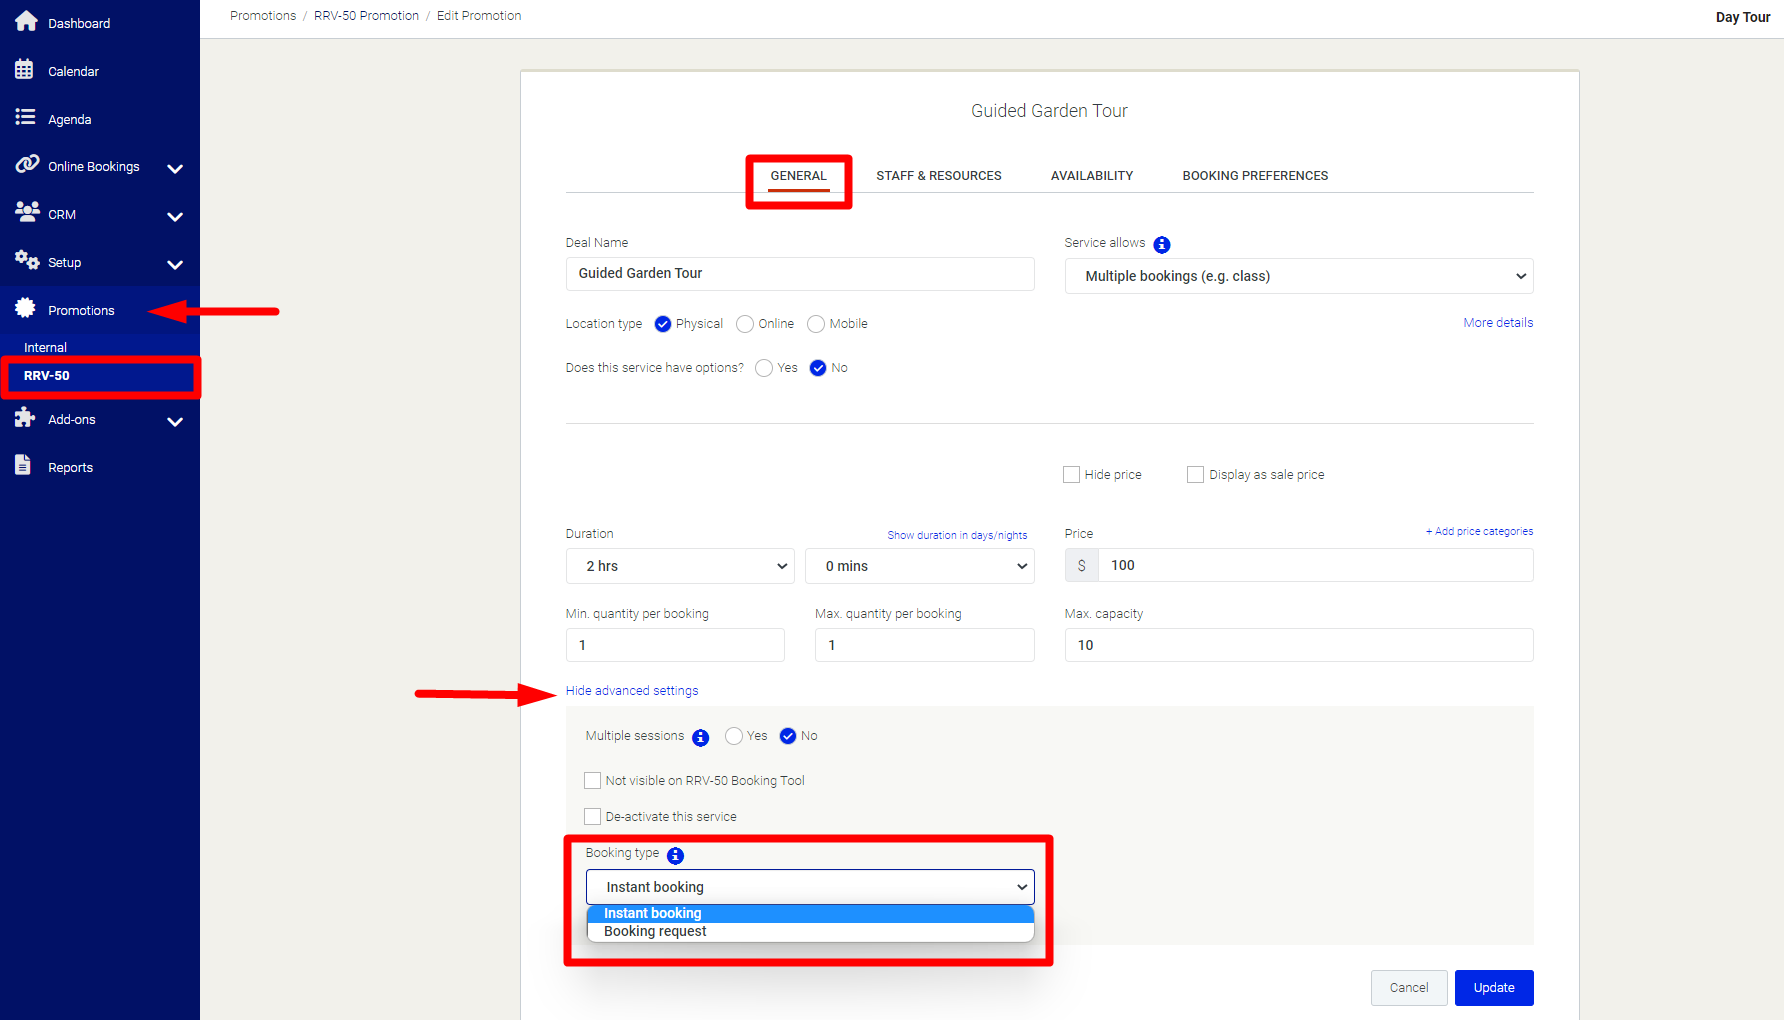
Difference between - Booking Request & Instant Booking
Whenever a service/promotion is added, the "Booking type" can be redefined to be an Instant booking (the default selection) or a Booking request.
Selecting Instant bookings allows customers to book automatically on the available time slot within your booking tool.
Selecting Booking requests means you (the merchant) will receive an email asking you to accept or decline the booking requested by the customer.
Using the left navigation menu, go to > Promotions > RRV-50 / RRV-100 / RRV-200 > Press the '•••' button to the right of the corresponding offer > Edit > General tab > View advanced settings > Booking type.
How to accept/decline a booking request via Nabooki account or email notification.
How to setup online payments
You are able to take online payments from customers when they are making a booking.
A payment gateway is a server that is dedicated to linking websites and banks so that online credit card transactions can be completed in real-time.
To add a payment gateway, use the left menu to navigate to Setup > Online Payments > Payment Gateway tab > enable Payment Gateway Integration.
How to update/change your availability
To update your availability, use the left menu to navigate to Promotions > RRV-100E / RRV-100 / RRV-200 / RRV-750 > Press the
'•••' button to the right of the corresponding offer > Edit. To display the availability section, navigate to 'Availability' in the top row of tabs.
If you define specific times, customers will only be able to select from those times when spaces are available. If you define any available time, customers will be able to select from any of the displayed time-slots, which are determined by the availability of the assigned staff and/or resources.
- If your service allows single bookings, you can select at specific times only or any available time.
- If your service allows multiple bookings, only specific times can be scheduled (such as scheduling specific class times).
The schedule specific times, click on the starting time slot and then select the applicable staff/resource. You can click on the timeslot for the specific schedule you are available, assign staff and hit Save.
If you wish to provide variable capacities for each day of the week, you can also define the capacity for each schedule as required.

Please note: Depending on your setup, you may be required to update the availability schedule of a parent service first before you can make changes to your promotion availability. If you encounter this please go to Setup > Services > Press the '•••' button to the right of the corresponding offer > Edit > Availability.
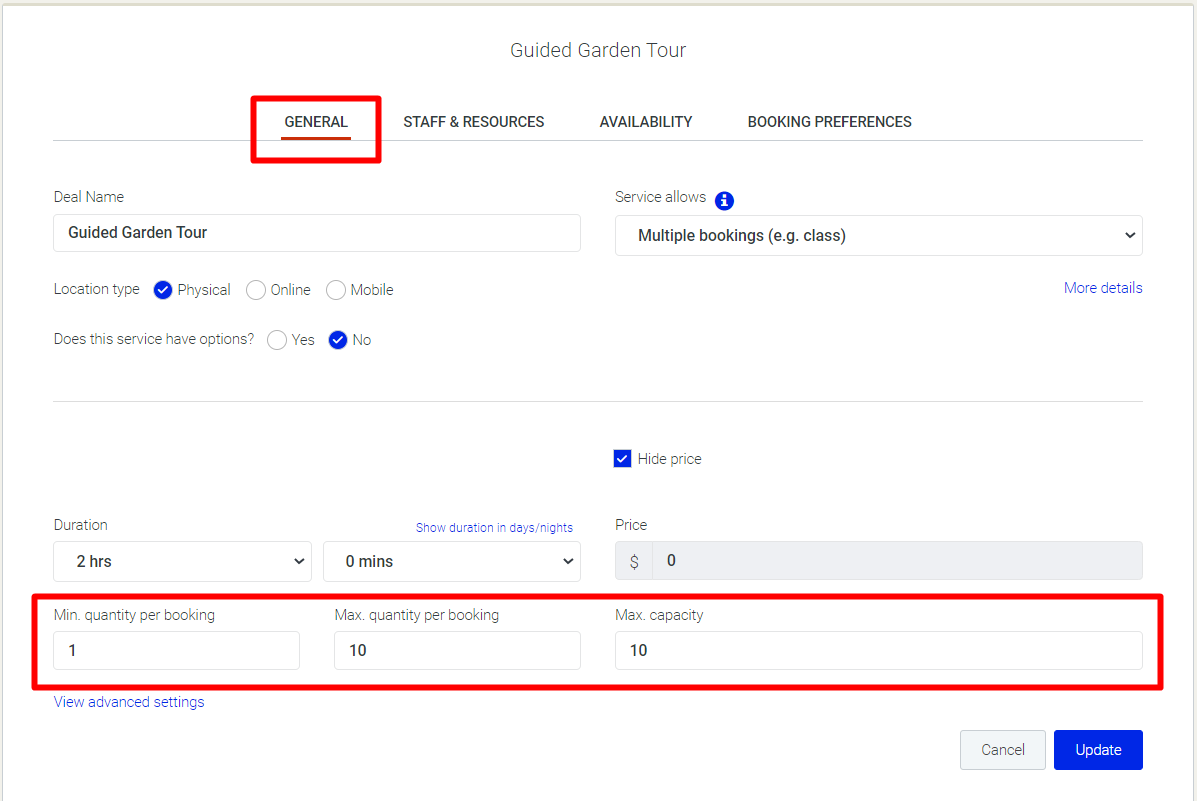
How to change capacities
How to change capacities globally:
This is done on the General tab via Promotions > RRV-100E / RRV-100 / RRV-200 / RRV-750 > Edit > General tab.
How to change capacities for select days of the week (e.g. Fridays):
This is done on the Availability tab via Promotions > RRV-100E / RRV-100 / RRV-200 / RRV-750 > Edit > Availability tab.
It will update globally for all Fridays avoiding any select dates you have fine-tuned on the Calendar.
How to change (fine-tune) capacities for individual dates:
Use the left navigation menu to go to Calendar > Select the date > Open the service > Press Edit Capacities > Adjust available capacities accordingly > Update.

NOTE: Any fine-tuned capacities will remain intact and not be changed even if the global capacity is changed via the General page or Availability page.
How to block out certain dates
There are two options to blockout availability; the individual experience or the entire date.
There is no need to block out dates beyond 30/6/2024. The offers end date automatically blocks any bookings beyond this date.

If your business is fully booked, it is critical that you block out dates in advance to prevent bookings. This includes Public Holidays (eg. Good Friday)
To make blocking out dates more convenient, you can rename your staff to the name of the offer/experience type. For example; 'Staff 1' can be renamed to 'Guided Garden Tour'.
To block out all experiences for a particular day:
In your calendar, under 'Staff & Resources' select 'All Staff' > Press ' Blockout' > Select the dates you wish to blockout (Red = Blocked out/ White = Available) > Update.
In your calendar, under 'Staff & Resources' select 'All Staff' > Press ' Blockout' > Select the dates you wish to blockout (Red = Blocked out/ White = Available) > Update.
To block out a single experience type:
In your calendar, under 'Staff & Resources' select the experience you wish to blockout > Press ' Blockout' > Select the dates you wish to blockout (Red = Blocked out/ White = Available) > Update.
How to check-in customers
You are required to check-in all customers in order to be reimbursed for the full value of their vouchers. If you do not check a customer in you will not be reimbursed for the voucher value.
Checking in customers will not be possible until 1 hour before the tour/experience.
Checking in customers will not be possible until 1 hour before the tour/experience.
Customers can be checked in at any time after the tour/experience has finished.
When you first log in you will be within the Dashboard's Activity section. Under Upcoming or Past you can click Check-in on a customer's booking.
When you first log in you will be within the Dashboard's Activity section. Under Upcoming or Past you can click Check-in on a customer's booking.
Alternatively, you can check in customers within the calendar. By clicking on a tour/experience you will bring up the tour/experience. Within the tour/experience you will see a checkmark. By clicking on the white check symbol, you will have checked in the customer.
Adding a booking manually via the diary
Using the left navigation menu, go to > Calendar > Select the staff assigned to display the schedules or go directly to the scheduled session > Press '+ Add booking' button > Fill in the required fields > Press 'Add Booking' button.
Processing a refund
If cancellation occurs and automatic refunds are not configured in your payment settings, partial refunds or full refunds can be issued to the customer.
Using the left navigation menu, go to CRM > Payments > select the customer from the list to open the booking window. You can also search by name in the search box at the top of the window.
Using the left navigation menu, go to CRM > Payments > select the customer from the list to open the booking window. You can also search by name in the search box at the top of the window.
The booking window will open to the payment tab and in the action field you can select the Amount to Refund. To provide a refund in full, enter the amount displayed or alternatively, you can provide a partial refund by entering a lesser amount and press Process refund.
How to cancel all bookings at once for a single schedule
Using the left navigation menu, go to Calendar > navigate to the scheduled booking > click 'Cancel Event'.

Please note: Once this button is clicked, it will cancel all bookings, close the event, and will not accept further bookings. While 'Close event' button will only prevent further bookings but will not cancel the bookings and can be reinstated.
Integrating your Nabooki account with Rezdy
Please click the link above that will direct you to our support article with detailed instructions for Rezdy integration.
Contact Support
Need assistance? Our dedicated support team for the River Revival Voucher Program is here to help you.
Email: rrv@nabooki.com
Phone: 08 7093 9777
To create a support ticket, click here.
Live chat: Start a live chat with our customer support team by clicking on the live chat button in the lower right corner.